Pages

Showing posts with label food. Show all posts

Wednesday, April 18, 2012

April Fools Day Fun! #2

Ok, so for my next trick, I made a HUGE PIE for LUNCH!!  But, it wasn't just any pie:)heheheheheee

This might look like a yummy sweet pie with green sprinkles, but in reality, it's a yummy SAVORY pie with green onion sprinkles!  This is a meatloaf PIE with creamy BLUE mashed potatoes piped on top!!  It was SO SO good too!  Here are some more pics!


Have you ever done any fun tricks for April fools???  Please share!!!

April Fools day FUN! #1

Well it looks like an average of every 10 days or so that I get a chance to get on here and post, so here are some catch up posts from the last few weeks!
This one is all about April Fool fun!  Most of you know my sons birthday is on April 1st, so, to add some fun to the day, I tried of few tricks!
The first one is a real easy trick with food coloring, cereal and milk!  Just add alittle to the bottom of the bowl before you put your kids cereal in.  Then, let them poor the milk and see there milk change color!  Check it out!

First are a few pics of the kiddos trying to figure out what the big deal is.

End result, alittle fun with breakfast, everyone smiled, it was cute!

Monday, March 5, 2012

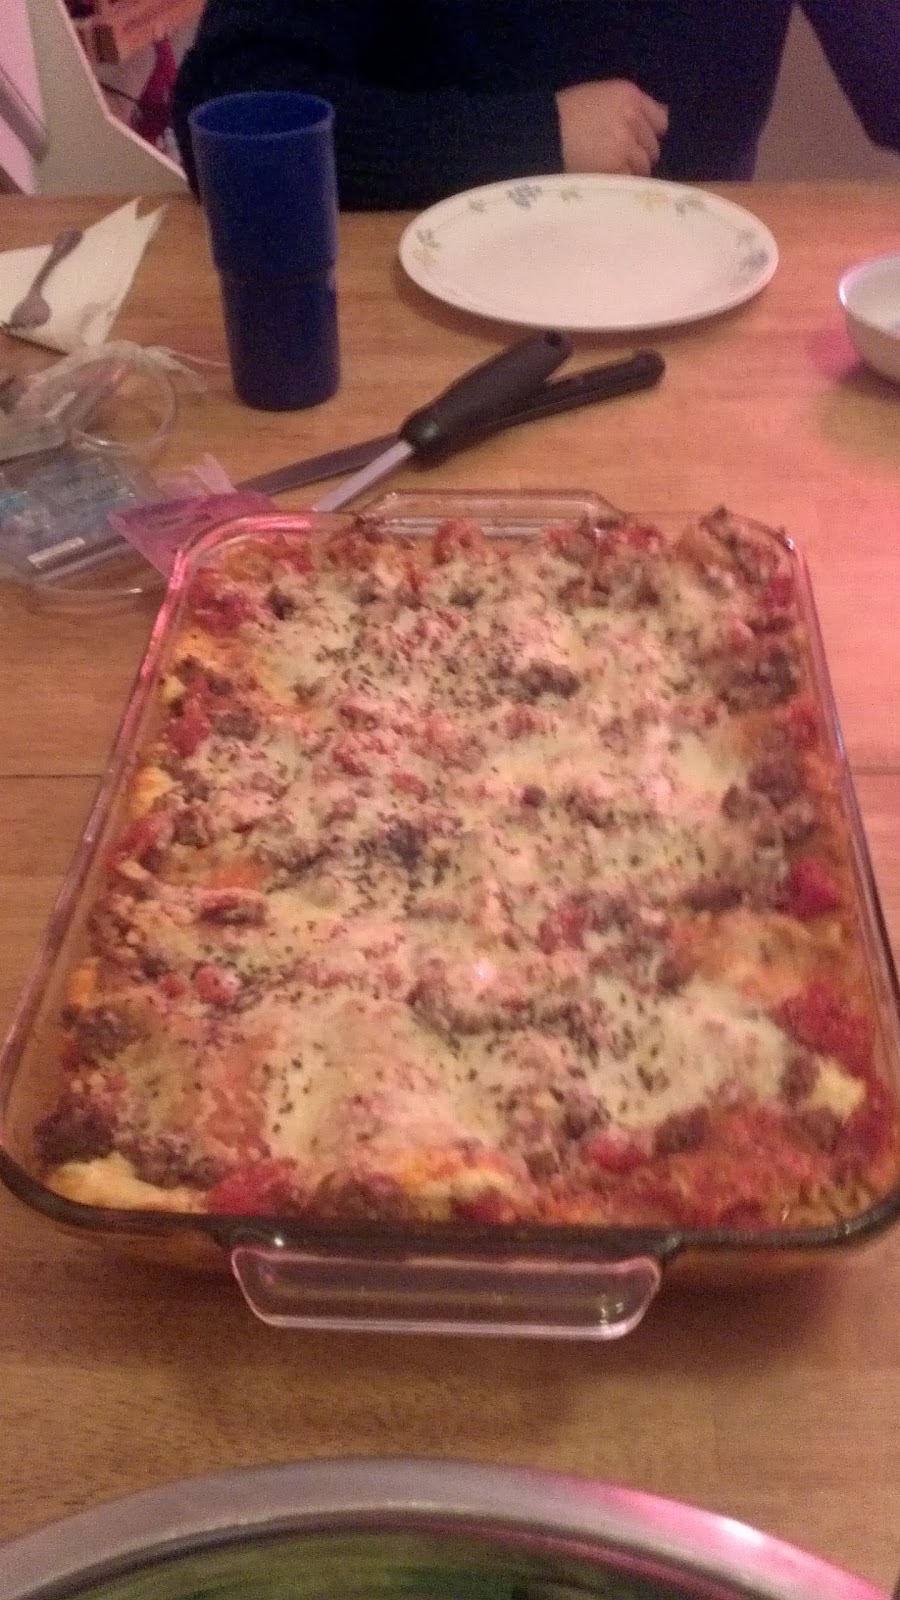
Samantha's FIRST Lasagna!!

My daughter Samantha is a member of American Heritage Girls and for one of her badges, she needed to cook Lasagna.... by herself!  She was SO excited to do this!  She did a WONDERFUL Job and it tasted GREAT, here are some pics:)


Happy Chef!!!  (...HAPPY family!:)

Sunday, March 4, 2012

Easy WONDERFUL Whole Wheat Bread!

After many attempts with different recipes, store bought whole wheat verses home ground wheat etc.... I have finally found the recipe that all of my family LOVES!!! This bread is SOFT and STRETCHY and CHEWY and WONDERFUL!!! Here are some pics of the beautiful loaf. Below them I will share the recipe. I make this in a bread maker on the dough setting and then bake it in the oven:) All credit for the perfection of this loafs goes to my friend Jeni. She hooked me up with home ground wheat ( which makes a HUGE HUGE difference) and helped me with some recipe malfunctions!! THANKS JENI! Take a look at it in all it's glory!
Happy customer:)
This one is getting way close to my bread... I mean... our bread...right...ours...
Ok, I guess we should love our bread, but not LOVE our bread!    LOL
A close up of me and loafy:)
YES we get excited about bread around here! So here's the skinny on the recipe. This is for a bread machine that makes 2lb loaves... I have a Long loaf pan, so I make one loaf, if you have a standard one you can make one loaf and some hot dog buns... hamburger buns... rolls... etc..
Basic FABULOUS whole wheat bread
1 1/2 cups WARM water
2 tbsp powdered milk
4 tbsp ( which is 1/4 cup) honey 1 1/2 tsp salt 2 tbsp coconut oil ( I use this in place of shortening now, but you can use olive oil just the same, coconut oil is SO good for you...but that is for another post:)
1 HEAPING tbsp vital wheat gluten (so important, you can get it at wal mart, makes soft stretch wheat bread!!!)
4 1/4 cups Freshly Ground Whole Wheat Flour ( now, I do replace that 1/4 cup of wheat with flax seed often because flax seed is so SO good for you and helps with fiber, which cancels out some carbs for us diabetics. That is the tiny brown specs you see in the pics above, you can NOT taste it, but it's there:)
Put it in your bread machine in that order and run it on the DOUGH cycle, which for mine takes 2 hours.
Then, I plop it out on a floured board, shape it to fit my long loaf pan ( or use a regular size one and make some rolls etc.. with the extra, I would use 2/3's of the dough for a regular size loaf pan, you can use it all, but it will be a TALL loaf:)
Then, spray your loaf pan WELL and place your dough in it. I cut some very shallow slits diagonal on the top of mine... maybe there's some real reasoning for that, but mostly I just think it looks pretty:)
Then, I place my loaf pan DIRECTLY in the oven and turn the light on.
I put the oven on warm for 1 MINUTE!! JUST ONE!! SET THE TIMER, YES, EVEN FOR JUST ONE MINUTE! I have lost many a loaf to forgetting to turn it off quick enough. The bread will get a bit of a hard crust on top and will keep it from rising anymore.... and at that point.... we have french toast sticks for breakfast!! LOL
Let the dough rise for at least 1 hour. I set the stove timer.
Then, I turn on the oven to 350 and bake it for 25 minutes or so. Doing it this way helps you from accidentaly hitting the pan or having to move it and then having the loaf fall on you....so sad when that happens:( There is a STRICT no running or jumping policy in the kitchen during that time, see why below:)
This COULD happen to your bread too.... NO BOUNCING in the kitchen! :)

Take it out, BASK in the glory of your beautiful loaf.... then humbly thank the LORD for your awesome bread:)
I let mine sit for 5 minutes to cool a bit then take it out and put it on a cooling rack till it completely cools.
DO NOT put it in a plastic bag till it's all the way cool, unless you want soggy bread.....
Bread making is so much fun and alot easier then some think, if you got a good recipe, a trusty bread machine and simple oven, YOUR IN BUSINESS!!
Blessings!

Sunday, January 29, 2012

Make your own "fortune"/ verse cookies!


     I get some blogs in my email with great idea's for crafting and cooking.  Gail over at CAN'T STOP MAKING THINGS has a really fun looking recipe for "fortune" cookies.  NOW, I'm not a big fan of the "fortune" part, BUT, I think I have a neat idea to still make these cookies fun without the fortune part...  Bible verses!!!  You can print out small slips of paper with really encouraging bible verses on them, maybe verses that speak of God's promises, or the ones that remind us who we are in Christ, and slip those in for a great little surprise treat for your friends!!  These look really easy to make and adaptable for those with allergies or restrictions.  I will probably make these with splenda and soy/coconut or almond flour to keep the carb count down for my diabetes:)  Hope you give these a try, just go to CAN'T STOP MAKING THINGS to get the recipe with good pictures too!

Wednesday, January 18, 2012

Chicken is on sale!!

     Wanted to send out a quick post to let all know in the area that Price Chopper has chicken leg and/or thighs on SALE for 69 Cents a pound!!!  How very ironic!!!  SO, get out there and buy some chicken and get cookin!!  Blessings!
Go to Price Choppers circular here:
http://pricechopper.shoptocook.com/circular/clickable.jsp

Tuesday, January 17, 2012

Cooking LOTS of chicken


     A few days ago I decided to cook a bunch of chicken and when I was all done I decided this might be a good thing to share on the blog! 
     A few months back there was this GREAT sale on chicken leg quarters (where the leg and thigh are still attached to each other).  They were selling this 10 lb. bag of chicken leg quarters for... I think it was  maybe 69 cents a pound!! CHEAP!  So I bought it thinking I would cook it someday I had time.  Well a few days ago I finally did!
     The first thing I did was rinse and dry all the chicken.  Then I put them all on foiled lined and oil sprayed cookie sheets ( easier clean up).  After that I salted and peppered both sides of each leg and then roasted them for around 50m to 1hr. at 350 degrees.  When they were all done we each had one for dinner with some peas and potatoes!! :)  But after that, I took all the skin and bones and put them in a stock pot and put all the chicken in another bowl ( I pulled it apart as I went so I didn't have to chop it up later).  I covered the bones and skin with water ( DON'T FORGET to add 1-2 tablespoons of vinegar, it gets the really good gelatiny stuff out of the bones) and let them boil for a very long time, ( I would normally do this in a crock pot up to 24 hours, then to the stock pot to condense the broth, but there was to many bones etc. to fit in my big crock this time!)  I let it boil/simmer for a long while, then I strained out the big bones and stuff into another bowl, then I used a even finer strainer one more time for some of the tiny stuff.  I put that bowl in the fridge over night so the fat would rise and somewhat harden.  This makes it easier to remove in my opinion.  What is left over is this rich almost gelatin chicken broth full of nutritional goodness!!!
     After you've got all the fat scraped off, ladle this into the smaller sized freezer ziplock bags ( don't forget to label the bags first, much easier this way:).   I used four cups for each bag.  You can push the bag down into a cup to make it easier to fill if your doing this alone.  Then I put them on a cookie sheet and froze them in the deep freeze.  And there you have it, homemade chicken broth!
     Then as you can see above, I separated out the chicken into 6 two cup bags and froze them too!!  Now I have some great items ready to make my life easier for meal for the next few weeks!  I have already done chicken noodle soup!  I used left over noodles from last nights dinner that I just put in a ziplock with alittle olive oil to keep them from gumming up.  Then I added a can of green beans, some pre-cut carrots that I froze this fall,  my broth and chicken alittle salt and pepper!  Instant YUMO!!  Hope you give this a try, it's been a blessing for this house!!


Sunday, July 24, 2011

Todays harvest

I went out and harvested a bunch of stuff today.  It was hot and sticky, but worth it.  I am SO thankful to the Lord for blessing this garden.  It is really going to help us out especially in the winter.  Take a look and see.  ANYONE can do this, you don't have to have a bunch of land!!!!  Just grab a small place with sun, even if it's on the roof and grow some yummies!!!

Sorry so dark, not a great camera.

a lot of cherries, some beef and Bradley tomato's and a few jalapenos

Pickling cucumbers. I picked some small ones to try and make mini sweet pickles...  there should be a few more ready in a few days

two of these are from actual red pepper plants, the rest of from green pepper plants!  I think I will cut most of these ones up in a almost mince size and freeze them for the winter.

a few carrots I pulled for the week.  There are some really wonky lookin ones in there.

Three large cucumbers and two medium size zucchinis.  I'm thinken of making some baked zucchinis chips this week.

Garden pictures UPDATE!

Well, I thought we were due for some new pics on how the garden is doing.  Take a look:
Strawberry Bed.  I am letting them put out new strawberry plants, rather then cutting the shoots and getting more berries.  I'm hoping next year it will be full enough to cut the shoots and give more berries a chance to develop.

I am getting a few straggler berries though:)

Arugula gone to seed

These are the little seed pouches.  I gotta get the girls on separating those out! :)

Cilantro gone to seed, which is coriander!  Need to get that harvest too.

Attempt at a close up, my camera isn't to spiffy at that.

In the background is one of the cantaloupe growing in the jungle...

There are many of these little micro cucumbers right now growing :)

Another cantaloupe in the back middle of the pic.up

Medium size cucumber

Two watermelons.  The one in the front has been growing for EVER but really isn't getting any bigger.... any suggestions?  Should I sacrifice it and cut it off for the greater good?????

New baby watermelon trying to make it's way

This is a pic on the right side of the large tub jungle.  These are my pickling cucumbers..

Zucchini, there is another one hiding in the grass that you can't see

The tomatoes are really doing well, SO BLESSED.

Small watermelon

Another cantaloupe

A newer cantaloupe growing

Here are the jalapeno plants.  They have been amazing!!  I have so many of these guys in my freezer right now.  Should warm up our winter months well!

Cherries

Finally getting some of these guys to turn to red!


Yellow pears!  I love these guys!  They really taste the same to me, but the color they bring to the party is so worth it!

Well, this was basil, Rosemary and parsley....  the rosemary and parsley did NOT make it:)  BUT, the basil is doing real well!

The lemon grove is very bushy now.  Hints of mint and oregano here and there , but mostly LEMON BALM!
So, there ya go, and here is some of the harvest that day ( about three or so days ago):
We went ahead and harvest all the onion bulbs that were left, they were lookin pretty done.


Yum yum.  I just froze in a zip lock bag most of the onions whole. 

LinkWithin

Related Posts with Thumbnails