Pages

Saturday, March 17, 2012

Quick shorts, a tutorial:)


Hi all.  Well my little man is turning 3 soon so I have been working at making him a few things for his birthday.  One thing I have been working on is a bunch of shorts for summer.  These are really for pajama's during those hot summer months.  I was blessed with this lightweight flannel material from my Aunt Mary.  At the time I didn't have a boy, so it's been sitting... but I DO now!! YEAH!  SO, here goes, so quick and easy shorts!  (IMPORTANT NOTE:  originally I made this with a used t-shirt, which is even FAST , maybe takes like 20 minutes, because you can use the bottom hem of the shirt as the leg hems!  LOVE THAT!  Just lay the shirt flat and put the shorts up against the right side fold and then flip them over for the left side fold of the shirt, easy!)

Ok, so fold your fabric and your nicely fitting shorts.  Put both folded sides together.  Cut about an inch extra on the bottom and top for the hems and I cut around 1/4 inch around the side for when you sew the two pieces together.

Hard to see, but my first cut piece is now flipped over to the left and laying on the next folded piece of fabric.  You can use the original shorts here, but this pattern has horizontal lines so I wanted to line it up.  once I lined it up, I cut the excess off the bottom and then just cut out the exact shape of the first piece ( cause it already has it's extra for hem etc..)

Pic to show you that the first cut out piece is now on the top of the next folded over piece to cut.  make sure your folds are together.

now you should halfs two identical folded pieces


unfold these pieces and put right sides together.  Now your gonna pin and sew from the top hem of the waist to the point of the crotch.  Don't sew  the rest of the strait way down yet! ( folded over part is the part you DON'T sew)
IMPORTANT NOTE:  If you are gonna make alot of these shorts, like I did, take one of these pieces and use it as a template for however many more shorts you want to make, it's much easier this way!

Sew front the top corner to the little tip before it goes strait again.


Now put those sewn seams in the middle and lay the shorts out flat, they are starten to look like shorts now!

Pin crotch area like this and then sew from the bottom of one leg to the bottom of the other.


Now fold a hem for your short bottoms.  I did 1/4 inch fold then maybe 1/2 to 3/4 inch fold and then sew all around.

Now fold the waist hem.  I did 1/4 first fold then fold that over about 3/4 inches, depending on the size elastic you have.


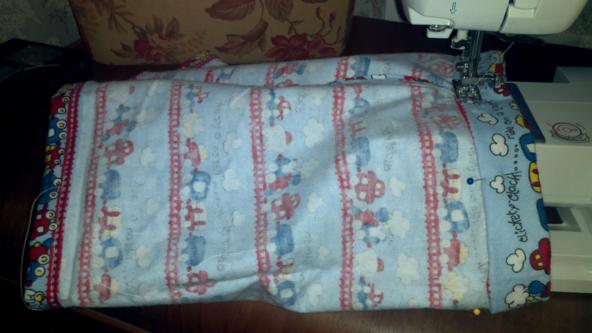
Now sew the hem close to the edge of the fold ALMOST all the way around.  I leave a inch or so opening to thread the elastic.

There is the opening in the back.

Grab some elastic, stick one of those thingys through it and feed it through the hem till you come out the other side.  Make sure you keep the other end from slipping into the hem line:)


Now once you got it through, check it on your kiddo, I believe a rule of thumb is 1 inch less then the measurement of your waist.  Then sew the two ends of elastic together and push them into the hem.

there in there now:)


Sew up the whole all the way across. I also ad a vertical line of sewing on the front or side or both of the waist line to keep the elastic from rolling.

walla, there you have it, instant shorts.  This took me about 30 minutes.


happy boy!

bootie shot
If you make these, let me know how it goes!!  Enjoy!

Saturday, March 10, 2012

Kansas Caucus


     I hope all you Kansans got out there and voted for your pick to run again Obama today!  Here's prayin the nominee kicks his bootie!

They that can give up essential liberty to obtain a little temporary safety deserve neither liberty nor safety. ~Benjamin Franklin, Historical Review of Pennsylvania, 1759

Statistics on Public School Vs Homeschool

I wanted to share with you a great article on homeschooling that friend shared with me. It's a very encouraging article to all homeschool parents, especially when your having a hard day! Enjoy it HERE!

Friday, March 9, 2012

Purim FUN!

Yesterday we celebrated Purim.  Purim is actually one of the minor Jewish feasts, like Hanukkah.  We enjoy remembering Purim because, well, we home school and love having fun with History for one.  But also, it's a wonderful book of the bible that tells of how God once again saved his people, and therefor Jesus, who was Jewish, was able to be born!!  So, we did some dress up, we made some traditional goodies and shared them with others.  We also brought some things to a local thrift store that provides goods for people in need and we also read the story in the bible as well as watched, "one night with the king" in the evening.  We had a great day!  Here are some pics ( and a totally silly video:):)  HAPPY PURIM!


Traditional cookie with three points filled with raspberry jam

Same but has the traditional filling of poppy seeds, honey and apple.  Also tried a cheese cake type filled one, SO good!

Ok, these have NOTHING to do with Purim, there Gluten Free Lemon Bars for a friend:)

Challah Bread...oh yeah! :)

One with poppy seeds, one without:)  makes GREAT french toast!

SUPER MAN TO THE RESCUE!

Thursday, March 8, 2012

Bandanna dress for a little girl:)

I have been wanting to do this for a long while... finally I was able to get it done.  I had made this for my adorable 1 year old niece, but after trying it on my sweet friends cute little 6 month old.... I'm pretty sure it would be to small!! lol SO, Alison ( the cute baby in the pics) gets to keep this one and I will make another one soon with two bandanna's instead of one!  I LOVE the colors of this bandanna!!  For this all I did was use some elastic thread for the bobbin, hand winding it tight and then sewed a bunch of lines... I think 6 or eight.  I cut some of the top off so I could use that later for some quick halter type straps.  EASY as PIE!!  I know, I should make bloomers... but they took alittle more time then I had at the time, so, next time!  Anywho, give it a try!!


Ya, I just LOVE this bandana!

Monday, March 5, 2012

What a WONDERFUL WONDER MILL!!

I just recently was blessed to get my own grain mill, a WONDER mill to be exact. 

I have been having a bit of fun milling things, including hard wheat, soft wheat, pinto beans and garbanzo beans so far:)  I did learn something right off though, when you turn on the wonder mill, the side container is so light that it whips around when you turn it on...... SO, don't have a FULL cup of wheat berries sitting right infront of it, or you will have this to clean up off the floor! lol....
SO, other then that crazy moment, things have been great!!!  Just hold it down and grind!!!  Here are some pictures of some ground pinto beans and garbanzo beans.
Pinto bean flour, GREAT for instant refried beans, soup thickener etc...

Hard wheat flour... nummy bread:)

Bean flour especially can cost SO much money, so I am excited to be able to grind it up and use it.  Does anyone know of a actual YUMMY gluten/dairy free bread????

Winter Jam

Recently my family and some friends went to a Christian Concert called Winter Jam.  Ten well known bands played as well all praised the Lord.  Here are some pics of the event!
Kayla, Bri and Sam

Ya, LARGE crowd:)

Sammy Wammy

Kayla Wayla

Where's Larry the cucumber????????  Keep looking.....

Ok, finally I got a picture of a bit of Bob the tomato...poor short thing:)

Inside at the beginning of the concert

It was a ok concert for me, last year was much more enjoyable to me because it felt like it was more worship and less show.... this year seamed much more show... the majority of the time I could not understand the words that people were singing, and alot of the words weren't on the screen this year so that made it alittle harder to sing with them.  But, all in all, it was REALLY load and showy, fog, lights, blasts of sparklers, stage tricks etc....  I get it's suppose to be entertaining.... but when does it cross over into... well.... glorifying the band , rather then the Lord?  I'm still working that one out, what do you think?

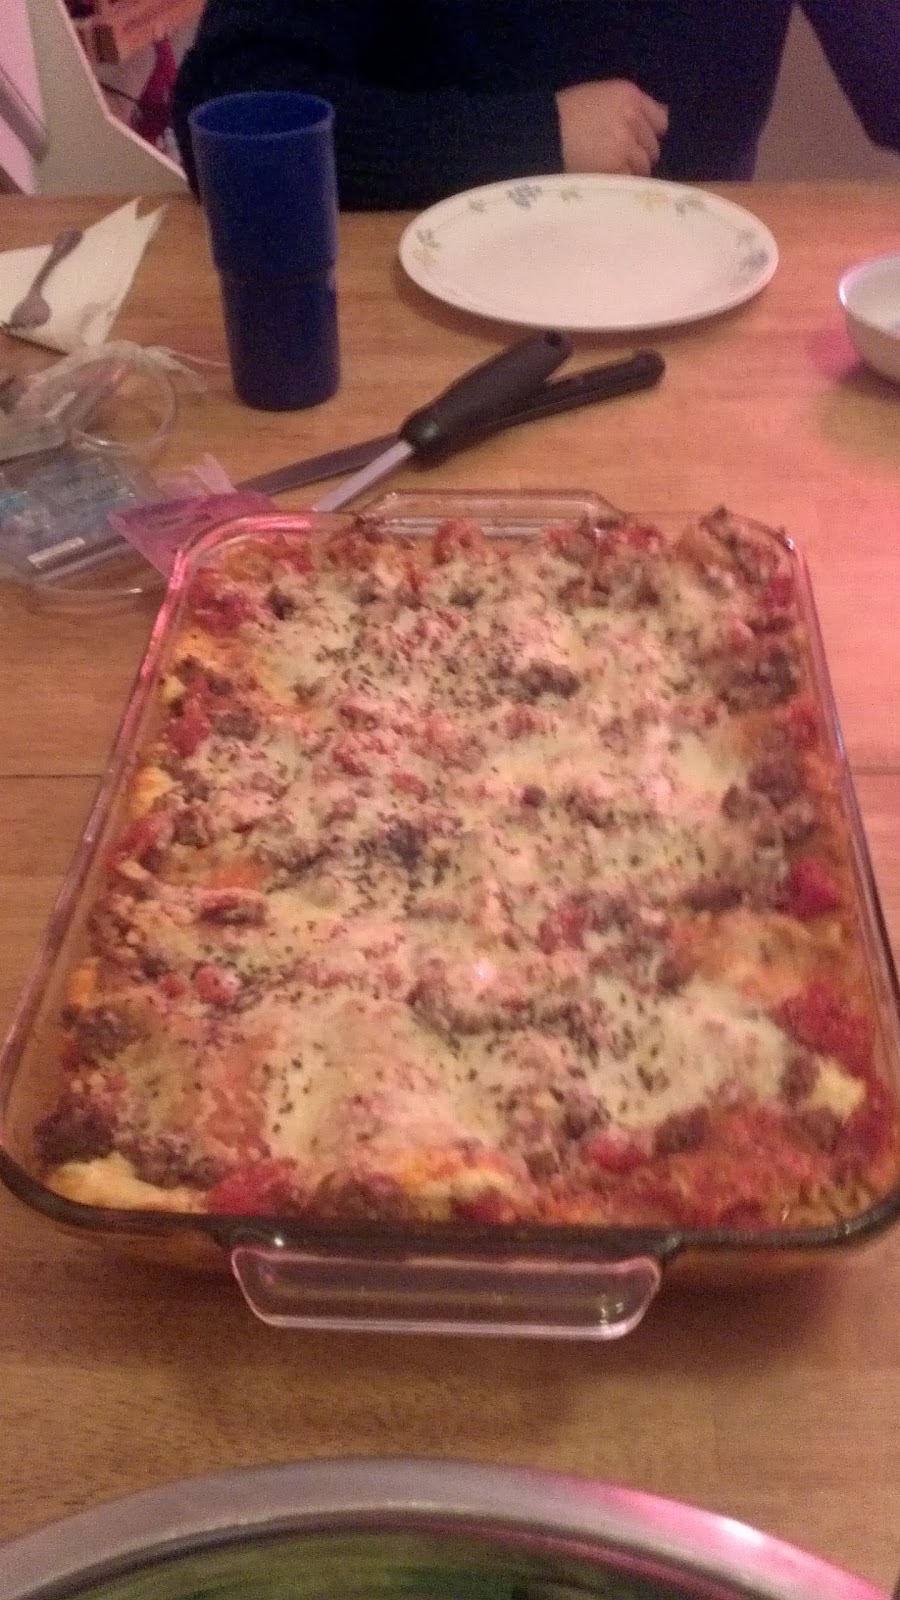
Samantha's FIRST Lasagna!!

My daughter Samantha is a member of American Heritage Girls and for one of her badges, she needed to cook Lasagna.... by herself!  She was SO excited to do this!  She did a WONDERFUL Job and it tasted GREAT, here are some pics:)


Happy Chef!!!  (...HAPPY family!:)

Crazy EXPLODING BOOK SHELF!!!

Ok, so, this is basically.... just really wierd!  SO, here goes.  I was laying in bed praying at 10:40 at night without my hubby who was gone at work.  Everyone else was asleep and all was quiet. Out of NO WHERE there was this huge CRASH!!!  I just kinda layed there in shock for alittle bit, then kept listening....  I went out into the living room and turned toward the dining room... then I saw it.  My bookshelf had EXPLODED!!  Maybe this is a sign.... to many books???? LOL  NEVER!!!  It was crazy though, so , ofcourse, had to take a picture!!!

Time to start SEEDLINGS:)

Spring....... what a beautiful word!  It's COMING!!! YEAH!  I just LOVE spring.  I love the colors, the warmer weather, the gardening.... it's awesome.  SO, it's about that time to start seedlings.  I started ALOT this year, way more then I will need.  I figure if I have alot of extra's I can sell them to those who don't want to bother with starting and buying all the stuff and watering, lights etc....  SO, here they are:
Here's the lot of them, on the far left in the plastic drawer are roma's and cherry tomatoes, up next to them are two different kind of Big Boy tomatoes, to the right of them are the cucumbers, and to the right of them are jalapenos.  In the bottom row on the right are the pickiling cucumbers, then the other flat are  sweet red pepper plants.

These here are my cucumbers....  they always jump right out of the dirt just 3 days after I plant them!!
So excited to see my little babies grow!  I will keep putting pictures up to show there progress.  I have a few newer ones already that I will add in a day or two.
Blessings!

Sunday, March 4, 2012

Easy WONDERFUL Whole Wheat Bread!

After many attempts with different recipes, store bought whole wheat verses home ground wheat etc.... I have finally found the recipe that all of my family LOVES!!! This bread is SOFT and STRETCHY and CHEWY and WONDERFUL!!! Here are some pics of the beautiful loaf. Below them I will share the recipe. I make this in a bread maker on the dough setting and then bake it in the oven:) All credit for the perfection of this loafs goes to my friend Jeni. She hooked me up with home ground wheat ( which makes a HUGE HUGE difference) and helped me with some recipe malfunctions!! THANKS JENI! Take a look at it in all it's glory!
Happy customer:)
This one is getting way close to my bread... I mean... our bread...right...ours...
Ok, I guess we should love our bread, but not LOVE our bread!    LOL
A close up of me and loafy:)
YES we get excited about bread around here! So here's the skinny on the recipe. This is for a bread machine that makes 2lb loaves... I have a Long loaf pan, so I make one loaf, if you have a standard one you can make one loaf and some hot dog buns... hamburger buns... rolls... etc..
Basic FABULOUS whole wheat bread
1 1/2 cups WARM water
2 tbsp powdered milk
4 tbsp ( which is 1/4 cup) honey 1 1/2 tsp salt 2 tbsp coconut oil ( I use this in place of shortening now, but you can use olive oil just the same, coconut oil is SO good for you...but that is for another post:)
1 HEAPING tbsp vital wheat gluten (so important, you can get it at wal mart, makes soft stretch wheat bread!!!)
4 1/4 cups Freshly Ground Whole Wheat Flour ( now, I do replace that 1/4 cup of wheat with flax seed often because flax seed is so SO good for you and helps with fiber, which cancels out some carbs for us diabetics. That is the tiny brown specs you see in the pics above, you can NOT taste it, but it's there:)
Put it in your bread machine in that order and run it on the DOUGH cycle, which for mine takes 2 hours.
Then, I plop it out on a floured board, shape it to fit my long loaf pan ( or use a regular size one and make some rolls etc.. with the extra, I would use 2/3's of the dough for a regular size loaf pan, you can use it all, but it will be a TALL loaf:)
Then, spray your loaf pan WELL and place your dough in it. I cut some very shallow slits diagonal on the top of mine... maybe there's some real reasoning for that, but mostly I just think it looks pretty:)
Then, I place my loaf pan DIRECTLY in the oven and turn the light on.
I put the oven on warm for 1 MINUTE!! JUST ONE!! SET THE TIMER, YES, EVEN FOR JUST ONE MINUTE! I have lost many a loaf to forgetting to turn it off quick enough. The bread will get a bit of a hard crust on top and will keep it from rising anymore.... and at that point.... we have french toast sticks for breakfast!! LOL
Let the dough rise for at least 1 hour. I set the stove timer.
Then, I turn on the oven to 350 and bake it for 25 minutes or so. Doing it this way helps you from accidentaly hitting the pan or having to move it and then having the loaf fall on you....so sad when that happens:( There is a STRICT no running or jumping policy in the kitchen during that time, see why below:)
This COULD happen to your bread too.... NO BOUNCING in the kitchen! :)

Take it out, BASK in the glory of your beautiful loaf.... then humbly thank the LORD for your awesome bread:)
I let mine sit for 5 minutes to cool a bit then take it out and put it on a cooling rack till it completely cools.
DO NOT put it in a plastic bag till it's all the way cool, unless you want soggy bread.....
Bread making is so much fun and alot easier then some think, if you got a good recipe, a trusty bread machine and simple oven, YOUR IN BUSINESS!!
Blessings!

LinkWithin

Related Posts with Thumbnails