Pages

Showing posts with label beading. Show all posts

Thursday, August 19, 2010

Plastic Bottle Wrapped Ribbon Bracelet TUTORIAL!!

Finally got the chance to do a quick tutorial on these fun, easy and cheap to make bracelet's! Enjoy!

Ok, so here is what you need:
Plastic bottle ( wrist size ), ruler, scissors, sharpie, exacto knife, ribbon and hot glue/gun.

Ok, so find the ridge at the top of the middle of the bottle.

Poke through and slowly start cutting off the top, try to stay as close to the ridge as you can.

When you come close to the end, it is easier to use the scissors to finish the cut.

Do the same thing to the other ridge at the bottom. You should end up with three pieces. The top and the bottom can still be used for things... you can cut down the sides and pull them back to make flowers...maybe spray paint them and stick a Christmas light through the bottom of the middle??? Any ideas?? :)

Now, measure how wide your middle piece is with the ruler, doesn't have to be perfect!

Mark the center with your ruler and sharpie.

Now mark the middle of either side with your ruler and sharpie.

This is where I eye ball it. You can make four three or two of these, even one if you want a REALLY wide bangle! I usually get about four strips out of each bottle.

You should have some strips that look something like this after you re-smoosh them back to circles:)

Now I look at each one and trim away the wonkie lookin parts:)

Now for the ribbon. It's hard to measure these things. For this one I took the end of the ribbon in one hand and ran it across my body all the way stretch out to the other hand. That was a bit much because I only barely overlapped when I wrapped the bracelet. You can try that way or you can go from one hand across to your other elbow... this is NOT a science:) If your to long, no worries, to short...you can add some ribbon on the inside with glue and still make it work out just fine!

Put some hot glue on the end and then quickly...

stick it to the inside of the bracelet!

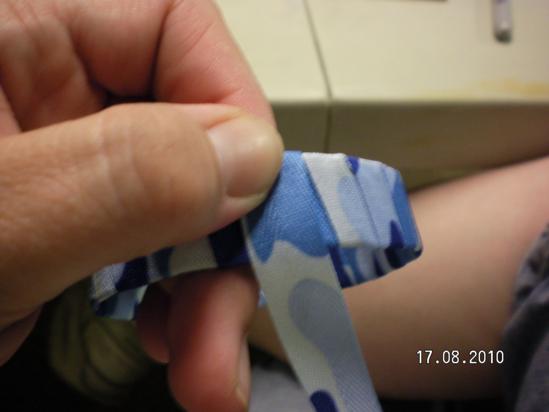
Now start to wrap, I try to only overlap alittle bit so that I am using the least amount of ribbon I have too, but you can overlap more if you like. Just make sure you keep the ribbon taught...(sp?)

Keep going....

Ok, so now we are at the end, make sure you get the front and back covered in ribbon. If you have to wrap a second time on top of ribbon, it's ok.

Now we need to cut off the excess.

Leave a tiny bit more then me, but not so much that it poke over the other side when you flip it. Now, put a hot glue blog on the inside end and flip over and press.

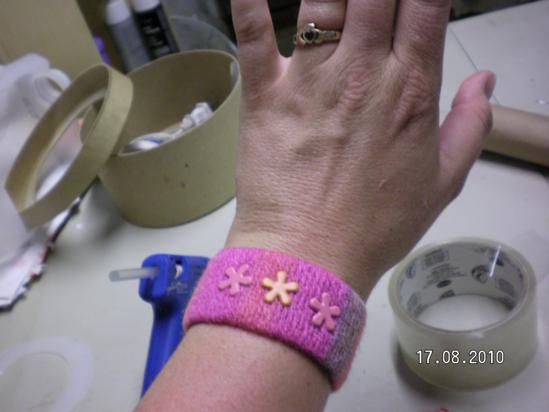
And there you have it. You can add other fibers over the top with beads, charms etc. Different ribbons...etc!! Easy squeazy lemon pleasy!

Tuesday, August 17, 2010

Toilet Paper Roll Bracelet Tutorial! Finally!! :)


This has been a long time coming but it's finally here! I found a bit of time to do a thorough tutorial of my yarn wrapped bracelets. I made a few modifications so they are more durable. Hope you enjoy!

Ok, so this is what you will need:
Yarn ( the changing color kind is my favorite!), large needle, ruler, toilet or paper towel roll, wide clear tape or contact paper, sharpie, scissors, cross stitch string, hot glue!

First, cut off a piece of the roll. Whatever size bracelet/bangle you like!

Here's mine...

Now cut it so it can lay flat like this.

Mine looked alittle wonkie on one side, if yours does, just eyeball trim it.

This is my quick quick solution for the edges. They will be slightly visible when the bracelet is done, so I decided to pick a coordinating sharpie and use that to color the ends. Make sure you do the very thin top, bottom and side edges. If you like, you can easily use a small piece of fabric here with hot glue or , I think it's called basting...something like that. Anyway, you can use something like that here if you like:) This idea is just way cheap and easy:)

Both edges finished

Now roll out some clear wide tape and stick it on there. I gave it around an inch extra on both sides. I am doing this because my daughters wore some previous ones that I made and got them completley soaked. They ofcourse being made out of paper ripped and got ruined. SO, this is my way to make them more durable/water proof!

Now cut the tape off...

flip over the edge tight...

flip over the other edge tightly

Flip over the top long side. I kinda rolled the tub on top of the edge to make it more even.

Then do the other side.

Now do the same thing to the other side of the tube so that both sides are sealed..

Like this!

Now put a thin strip of hot glue across the edge on one side, just over from the edge, not right on it.

Smoosh the end of your yarn on the edge.

For extra security, I put another drop of hot glue on the top front side and wrapped the yarn tight together over it. I think I would do this on the back next time. Just to try to keep an possible glue sepidge on the back of the bracelet. DON'T wrap the yarn to tight, or your will crimp your roll!!

These three wraps got glued down.

Now just keep going. I love how the yarn changes color through this!!

Half way there! At this point you can add a cute bead or charm. You can actually add beads and charms throughout if you like!! Make it your own!

Now were at the end. I put a small strip of hot glue on the front at the end, then smush the yarn on it. Then flip over and do another strip of glue, smush, and cut off the end. ( sorry, don't know what happened to the backside pic!?)

So you should have something like this now.

Now you can, if you want, add some cute brads. I had some cute scrapbook brads so I added a few of those. Just eyeball the middle and poke your hole.

Stick the brad through...

I added a few to the sides...

Now you should have the end of the brads sticking out like this.

flatten out the brads against the roll, NOT the yarn.

re-smoosh the yarn to cover the brads!! See, invisible!!!

Now cut some cross stitch string...or maybe it's called embroidery floss??

Going from the bottom, sew through the end of the bracelet.

Bead on your button.

Sew through the other side of the button. This one has two holes, if you have more, sew through those as well.

I came back and sewed through both sides again for a more secure button.

Now the button should be on tight and you have to now Tie, double knot, the ends.

Cut most of the excess and tuck the rest under. I should have done this better, It doesn't have to be seen at all if you do it right.

like this.

Now cut another piece of floss. I cute this alittle shortish, I would do around atleast 10 inches next time.

Sew from underneath up through the bracelet. I would sew this closer to the middle next time.Then come back through the top.

Tie these as close to the ends as you can.

Cut a bit off if you need to and tuck the rest under the yarn.

So this should be around what the inside of your bracelet looks like.

And this should be the front!

Now to put it on! OH YES, if made properly, pretty easy to put on with one hand!

Wrap string around the button. I now we have made a loop with the string, but wrapping it makes it fit anybodys wrist and keeps the bracelet on quite securely!

And there it is!! Go make your own and please come back with pictures of your creations!

Ribbon wrap plastic bottle bracelets next!

LinkWithin

Related Posts with Thumbnails