I've been working hard at getting a new blog up and running. This blog is to sell stuff to help the family, especially when the winter hits. Mostly the sight will have things that I have made, but there will also be just stuff I have to sell. Please take a look! I hope you enjoy it!!
Showing posts with label belts. Show all posts
Saturday, August 28, 2010
New blog FINALLY up!!
I've been working hard at getting a new blog up and running. This blog is to sell stuff to help the family, especially when the winter hits. Mostly the sight will have things that I have made, but there will also be just stuff I have to sell. Please take a look! I hope you enjoy it!!
Monday, August 2, 2010
Quicky post of my newly made Patchwork Starburst Belt!
I have been itchen to make a candy wrapper belt for some time and finally got a chance to a few days ago. Many starbursts were consumed in the making of this belt....:) YUMMO! Used some wide clear tape, canvas fabric I had for the back and a sewing machine!Just need to add some D rings. I had some rectangle style ones that I added, only to find out that they won't work right...keep slipping through each other...Soooo, need to get some D rings that are a little smaller then the ones I have. That should do the trick!! I just love pink, don't you!!!
Monday, July 26, 2010
New favorite! Scrap vintage patchwork belt!

Ok, so I had a bunch of vintage fabric rectangles that a friend had given me a few years ago and thought they would work perfect for this project. The belt I was going to use was pink so I picked out some cute pink pieces and layed them out to make sure it would be long enough. I think I added a few extra to make up for the seams... I am NOT a well schooled sewer, so please, bare with me!!

Now I got them all in order and started sewing right sides together to make the front of the belt.

Now please forgive me , but I got so excited about this belt that I forgot to take a few pictures. After I got them all sewed together, I realized that some of the pieces were very thin and see-through and that the lines on the belt would show through. SO, I got some thin white fabric scrap and , doubling it, I cut a piece as big as the strip I had. Then I sewed wrong sides together to make a thicker, non-see through strap.

Now I realize how very non-perfect this is, but I am quite the lazy sewer and HATE pinning things unless absolutely necessary! SO, I just moved it as I went to make sure it was basically right...ish:)

Now it's a lined strip with raw edges.

So now I folded the ends and sewed them.

Then fold as you go and sew up one side.


Now I checked to see where I need to fold up the other side to so the belt would be the same size as the striped belt.

Then sew up the other side, folding and sewing as you go...if you can handle that. It's kinda wrinkly underneath and not perfectly aligned... I'm ok with that, but I know some of you just want to make it just right, that's ok too! I'm just way to impatient.... I'm working on it...:)

Now at this point, I'm starten to think, "WOW, this is gonna be a seriously thick belt...ummmm, maybe just MAYBE, I could make this a stand alone belt, without the thrift store one????

Then I realized I would have to back it cause of all those raw edges... So , more rectangles:)

Do pretty much the same things as with the other rectangles. Like sides together then flip and sew all the sides.

And there you have it...

Now the two shall become one!! Sew it on the back:)

And there it is!! cute!!

Now, I snagged the D rings from the thrift store belt. I did I small fold then a larger one with the D rings inside and then I sewed it shut. I sewed this by hand rolling the machine. This was pretty thick and this is my LAST needle!!!! So I really didn't want to break it!

And there you have it!! Cute and fun, a couple hours and done! Now there is risk in not using a pattern or directions.... being that this is a D ring belt, I forgot to add cute scraps to the back of the end of the belt. SO, the backside of the belt will show when on...but, oh well, I still think it's cute and funky!!
ENJOY!
Tuesday, July 20, 2010
Coke can TAB BRACELET
This is a fun a funky way to make a cool bracelet. After you do this once, think about spray painting the tabs different colors, using different stretch cord or even ribbon! Here is what I did. You can find a great tutorial HERE. Hmmmm, I'm thinken this could become a belt!!! Hehehehhee that sounds fun!
T-Shirt Yarn Tutorial!
OK, here it is finally! T-shirt yarn has endless possibilities! Well, of course you can do anything you can do with regular yarn, with t-shirt yarn! It is very durable and fun to work with! Here is how you do it: ( I have done this with shirts that have seams on the side, but tube seamless shirts work the best. That way when you pull the yarn it's less likely to separate when there isn't a seam to pull.)

First, if there's a cool design on your shirt you want to cut out, go ahead and do it now if you like!! I am working on a family t-shirt quilt present for Christmas, so I am going to try to cut out as many of these squares as I can with our old t-shirts.

OK now it's cut out.

You want to cut as close to the armpit of the shirt as possible, and strait across to the other armpit.

Now you want to cut off the bottom hem of the shirt.

Here it is all finished. You should have a nice tube rectangle now. Don't even THINK of throwing away the top or bottom you cut off!! You know you can do something super cool with it!!

Now take the bottom part of the rectangle ( as in one of the short sides) and fold it up on top of the rest of the tube but keep it an inch from the top.

Now, once again, fold that same short side up again to where you folded the first one. Keep that one inch at the top clear. Now you start cutting. You can do this as wide or skinny as you want. The skinnier the more yarn you get. I think I did it about um...an inch maybe. I kinda eyeballed it. You can go as far as marking it so it will be close to perfect even at the end. I am NOT that patient! DO NOT I repeat DO NOT cut that top inch through!! That is the cool part later that makes this one long piece of yarn:)

Your half way there!! Don't give up! I know it's tuff but keep cutting up through the folds but NOT all the way through the inch at the top!!

You did it!!! Piece a cake!!

Here is a close up of the top where you cut through the folds but not the VERY top!

Now this part I would do on my arm, but for taking pictures I am using a yard stick. Slip your arm through so that the inch at the top that you DIDN'T cut lies on top of your arm and the strips fall on either side of it.

Now, slip you scissors through the first cut and cut a slice through diagonally to the SECOND strip on the other side. This is VERY important. This makes the continuous yarn. Keep cutting, from the front strip to the next strip over on the other side.


Now when you come to the end, just cut a diagonal slice to the other side.

Then come back and cut from the outside a diagonal strip to that first cut that you skipped in the beginning.


Now you should have one long continuous strip of t-shirt!

Ok, this is the fun part.

Grab one end...

and then grab alittle ways down, like a foot or so , and pull!

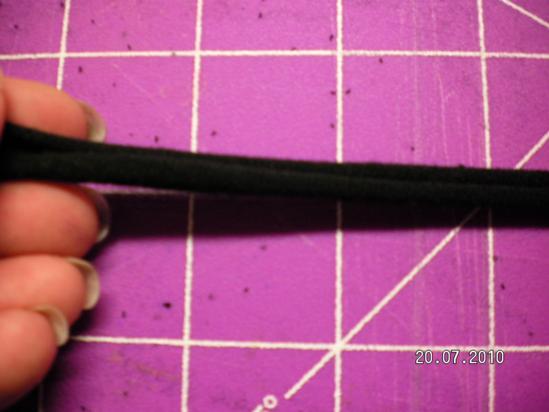
This is the result, a tube like yarn!

Now I have someone to demonstrate! Grab the yarn and...

Pull!!!!!

Now you have a MUCH longer pile of T-shirt yarn!

Now what I do, is grab a scrap piece of thick paper or cardboard from junk mail ( or use scraps of juice cartons from your coin purses!!

Start wraping your yarn around it....

And there you have it!! A wonderful ball of T-shirt yarn!!

I made three of these a while back and braided them! Then I took that braid and criss cross stitched it in a circle. My thought here was a to make a cute 4th of July rug or trivit type thingy for the table.... well, I realized quickly that I was pulling as I was sewing and that made the edges curl up.... SOOOoooo, now I have a nice big fruit bowl for the kitchen!!! LOL !!!! Still cool though!!

.JPG)
Well there you have it. You can also weave this well I hear. That will be my next project I think! So, if you have any questions let me know and I will do my best to answer!!

First, if there's a cool design on your shirt you want to cut out, go ahead and do it now if you like!! I am working on a family t-shirt quilt present for Christmas, so I am going to try to cut out as many of these squares as I can with our old t-shirts.

OK now it's cut out.

You want to cut as close to the armpit of the shirt as possible, and strait across to the other armpit.

Now you want to cut off the bottom hem of the shirt.

Here it is all finished. You should have a nice tube rectangle now. Don't even THINK of throwing away the top or bottom you cut off!! You know you can do something super cool with it!!

Now take the bottom part of the rectangle ( as in one of the short sides) and fold it up on top of the rest of the tube but keep it an inch from the top.

Now, once again, fold that same short side up again to where you folded the first one. Keep that one inch at the top clear. Now you start cutting. You can do this as wide or skinny as you want. The skinnier the more yarn you get. I think I did it about um...an inch maybe. I kinda eyeballed it. You can go as far as marking it so it will be close to perfect even at the end. I am NOT that patient! DO NOT I repeat DO NOT cut that top inch through!! That is the cool part later that makes this one long piece of yarn:)

Your half way there!! Don't give up! I know it's tuff but keep cutting up through the folds but NOT all the way through the inch at the top!!

You did it!!! Piece a cake!!

Here is a close up of the top where you cut through the folds but not the VERY top!

Now this part I would do on my arm, but for taking pictures I am using a yard stick. Slip your arm through so that the inch at the top that you DIDN'T cut lies on top of your arm and the strips fall on either side of it.

Now, slip you scissors through the first cut and cut a slice through diagonally to the SECOND strip on the other side. This is VERY important. This makes the continuous yarn. Keep cutting, from the front strip to the next strip over on the other side.


Now when you come to the end, just cut a diagonal slice to the other side.

Then come back and cut from the outside a diagonal strip to that first cut that you skipped in the beginning.


Now you should have one long continuous strip of t-shirt!

Ok, this is the fun part.

Grab one end...

and then grab alittle ways down, like a foot or so , and pull!

This is the result, a tube like yarn!

Now I have someone to demonstrate! Grab the yarn and...

Pull!!!!!

Now you have a MUCH longer pile of T-shirt yarn!

Now what I do, is grab a scrap piece of thick paper or cardboard from junk mail ( or use scraps of juice cartons from your coin purses!!

Start wraping your yarn around it....

And there you have it!! A wonderful ball of T-shirt yarn!!

I made three of these a while back and braided them! Then I took that braid and criss cross stitched it in a circle. My thought here was a to make a cute 4th of July rug or trivit type thingy for the table.... well, I realized quickly that I was pulling as I was sewing and that made the edges curl up.... SOOOoooo, now I have a nice big fruit bowl for the kitchen!!! LOL !!!! Still cool though!!
Well there you have it. You can also weave this well I hear. That will be my next project I think! So, if you have any questions let me know and I will do my best to answer!!
Subscribe to:
Posts (Atom)