

Hi all. Well my little man is turning 3 soon so I have been working at making him a few things for his birthday. One thing I have been working on is a bunch of shorts for summer. These are really for pajama's during those hot summer months. I was blessed with this lightweight flannel material from my Aunt Mary. At the time I didn't have a boy, so it's been sitting... but I DO now!! YEAH! SO, here goes, so quick and easy shorts! (IMPORTANT NOTE: originally I made this with a used t-shirt, which is even FAST , maybe takes like 20 minutes, because you can use the bottom hem of the shirt as the leg hems! LOVE THAT! Just lay the shirt flat and put the shorts up against the right side fold and then flip them over for the left side fold of the shirt, easy!)
 |
| Ok, so fold your fabric and your nicely fitting shorts. Put both folded sides together. Cut about an inch extra on the bottom and top for the hems and I cut around 1/4 inch around the side for when you sew the two pieces together. |
 |
| Hard to see, but my first cut piece is now flipped over to the left and laying on the next folded piece of fabric. You can use the original shorts here, but this pattern has horizontal lines so I wanted to line it up. once I lined it up, I cut the excess off the bottom and then just cut out the exact shape of the first piece ( cause it already has it's extra for hem etc..) |
 |
| Pic to show you that the first cut out piece is now on the top of the next folded over piece to cut. make sure your folds are together. |
 |
| now you should halfs two identical folded pieces |
 |
| unfold these pieces and put right sides together. Now your gonna pin and sew from the top hem of the waist to the point of the crotch. Don't sew the rest of the strait way down yet! ( folded over part is the part you DON'T sew) IMPORTANT NOTE: If you are gonna make alot of these shorts, like I did, take one of these pieces and use it as a template for however many more shorts you want to make, it's much easier this way! |
 |
| Sew front the top corner to the little tip before it goes strait again. |

 |
| Now put those sewn seams in the middle and lay the shorts out flat, they are starten to look like shorts now! |
 |
| Pin crotch area like this and then sew from the bottom of one leg to the bottom of the other. |

 |
| Now fold a hem for your short bottoms. I did 1/4 inch fold then maybe 1/2 to 3/4 inch fold and then sew all around. |
 |
| Now fold the waist hem. I did 1/4 first fold then fold that over about 3/4 inches, depending on the size elastic you have. |

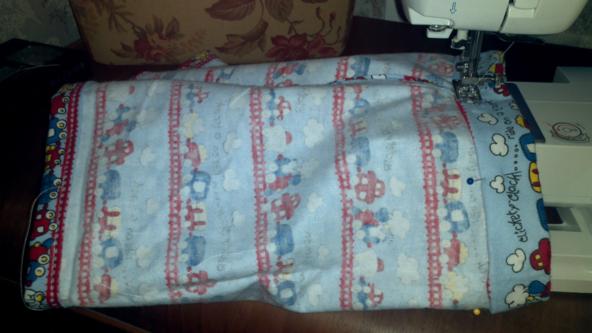 |
| Now sew the hem close to the edge of the fold ALMOST all the way around. I leave a inch or so opening to thread the elastic. |
 |
| There is the opening in the back. |
 |
| Grab some elastic, stick one of those thingys through it and feed it through the hem till you come out the other side. Make sure you keep the other end from slipping into the hem line:) |

 |
| Now once you got it through, check it on your kiddo, I believe a rule of thumb is 1 inch less then the measurement of your waist. Then sew the two ends of elastic together and push them into the hem. |
 |
| there in there now:) |
 |
| Sew up the whole all the way across. I also ad a vertical line of sewing on the front or side or both of the waist line to keep the elastic from rolling. |
 |
| walla, there you have it, instant shorts. This took me about 30 minutes. |

 |
| happy boy! |
 |
| bootie shot |

If you make these, let me know how it goes!! Enjoy!


